
This chapter contains the following topics:
Designing Financial Data Extracts
This chapter describes the selections in the Extract financial data menu.
The Extract financial data selection is for users who want to review financial data outside of PBS. This selection produces coma-separated-values (.csv) files that can be loaded in a multitude of spreadsheet or database software. See Comma-separated-values (CSV). A program commonly used to display .csv files is Microsoft Excel.
Financial statements work in three phases: layout, specification, and process.
| • | The layout phase is further divided for column and row. |
In the column layout design, you define, column by column or group of columns, the amount(s) you want to extract. You will specify such things as the fiscal year, whether to use actuals, budgets, or comparatives information, the number of periods, how to sum it up and restrictions based on account settings. Up to 256 columns may be added. See Entering Column Layouts.
In the row layout design, you specify, line by line, which accounts are to be included in the financial data extraction file. You can intersperse various commands to control headings, totals, and other formatting functions. See Row Layouts, Enter.
Both layouts, once built, are saved and may be used by more than one specification. Each layout can be copied and modified to various requirements.
| • | In the specification phase, you link column and row layouts. Specifications, like layouts, are saved for future use. This phase is described in four sections within this chapter. |
| • | In the processing phase, the financial data file(s) is produced and saved. This phase is described in the Produce Files section of this chapter. |
Extract financial data layouts are sets of parameters you enter to produce the columns and rows in which financial data is extracted.
For each column layout you may enter several kinds of parameters:
|
Column Parameter |
Description |
||||
|
Fiscal year |
To specify which fiscal year to use for a column or set of columns |
||||
|
Type |
To specify whether Actuals, Budget or Comparative information should be used |
||||
|
Budget type |
Only needed to further define Budget type above |
||||
|
Column header |
To set a user defined header |
||||
|
Period number range |
A range of multiple periods will result in multiple columns unless the next entry is a sum of periods such as Quarter or Year |
||||
|
Amount for |
To specify whether the amount extracted is for each period, quarter or the year; |
||||
|
Balance type |
To specify how to sum up transactions; |
||||
|
Group/Cost center |
|
For each row layout you enter two kinds of parameters:
|
Row Parameter |
Description |
|
Account numbers |
To specify which accounts to provide information for in the financial data extraction file; |
|
Functions |
To insert a blank row, totals, etc. to control various aspects of the extraction’s appearance. |
The next section provides a description of how you enter a column layout.
Select
Column layouts, enter from the Extract financial data menu. The following screen appears:
One screen is needed to enter column layouts. From this screen you can work with both new and existing layouts.
Enter the following information:
1. Column layout #
Options
Enter a number to identify this layout, or use one of the options:
|
<F1> |
For the next column layout |
|
<SF1> |
For the previous column layout |
|
Format: |
999 |
|
Example: |
Type 1 |
2. Description
Options
Enter a description of this column layout.
|
Format |
2 lines of 25 characters each |
|
Example |
Type Sales schedule columns |
Field number to change ?
Options
Make any needed changes. For an existing layout you may also use one of the options:
|
<F1> |
For the next column layout |
|
<SF1> |
For the previous column layout |
|
<F3> |
To delete this layout. You can delete a layout even though an existing specification references it, so be careful. |
When you press <Enter>, the screen display changes to this:
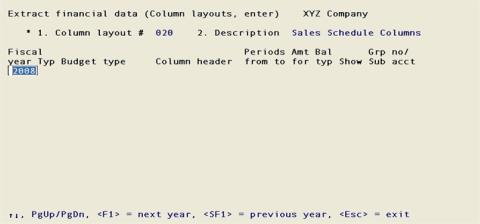
Use the bottom portion of this screen to enter individual or group of columns definition for the values being extracted in the financial data file.
This is a scrollable screen of unlimited length.
You enter one line for each column or group of columns in the order in which you want them to appear.
Options
You can change the order in which the lines appear or modify the content of each line by using these keys shown on the screen:
|
<Up> |
To move to the next line |
|
<Down> |
To move to the previous line |
|
<PgUp> |
To move to the next screen |
|
<PgDn> |
To move to the previous screen |
|
<F1> |
For the next fiscal year |
|
<SF1> |
For the previous fiscal year |
|
<F2> |
To allow insertion of a new line at the current line's position (moving all subsequent lines down by one line) |
|
<SF2> |
To move or copy the current line. After pressing <SF2>, go to the line below the location where you want the line, and press: |
|
<F3> |
To delete the current line |
|
<Enter> |
To move the line (deleting it from its original location), or <F1> to insert the copy, or <Esc> to cancel the move / copy |
|
<Esc> |
To cancel a change or a move / copy function |
For each line enter the following fields:
Fiscal year
Options
Enter a number to identify the fiscal year represented in this column, or use one of the options:
|
<F1> |
For next year |
|
<SF1> |
For previous year |
The current fiscal year is used as default.
|
Format |
CCYY |
|
Example |
Select <Enter> for the current fiscal year |
Typ
Enter a financial type from the list below:
|
Code |
Type |
|
A |
Actuals |
|
B |
Budgets |
|
C |
Comparatives |
|
Format |
One letter from the list above |
|
Example |
Type A |
Budget type
Available and required only when requesting Budget information per previous selection.
Options
Enter a budget type, select one from the list or use one of the options:
|
<F1> |
For the next budget type |
|
<SF1> |
For the previous budget type |
|
Format |
15 characters |
|
Example |
Press <F1> |
Column header
Leave blank, enter description for your column(s) or use the <F2> option to load a default. If you enter “##”, these two (2) characters will be replaced by the period number you select next. If you select a range of periods resulting in multiple columns, each column header will be numbered accordingly.
|
Format |
Enter up to 15 characters |
|
Example |
Press <F2> |
Periods from/to
Enter a period number range. If you selected the Actuals for this column or group of columns, the range is restricted to that Fiscal year number of periods as found in the accounting periods information. You may also use one of the options:
Options
|
<F1> |
To include "All" periods |
|
<F2> |
For beginning balance of the year |
|
Format |
99 |
|
Example |
Type 1 |
Amt for
Enter the type of amount from the list below. Selecting Period or Quarter will generate as many columns as necessary to satisfy the range defined. Only one column will be generated for Year.
|
Code |
Type |
|
P |
Period |
|
Q |
Quarter |
|
Y |
Year |
|
Format |
One letter from the list above |
|
Example |
Type P |
Bal typ
Indicate the balance type from the following table:
|
Code |
Type |
Description |
|
B |
current balance |
Shows current balance of each period. It starts with "starting period" selected and carries the balance into the next period. Balances for non-selected previous periods are ignored.
If you start with reporting on period 1 of the fiscal year, it will have the same amounts as year-to-date balance. |
|
C |
current credits |
Shows only current balance credits for each period. Credits are negative amounts if non-correcting entries, and positive amounts if correcting entries |
|
D |
current debits |
Shows only current balance debits for each period. Debits are positive amounts if non-correcting entries, and negative amounts if correcting entries |
|
F |
final balance |
Shows final balance of each period because it includes previous fiscal year balance brought forward. |
|
N |
net change |
Shows net change for each period. |
|
Y |
year-to-date balance |
Shows net year-to-date balance for each period. Previous periods from fiscal year are included in the addition of periods being reported even if you don't start with period 1. |
|
Format |
One letter from the list above |
|
Example |
Type B |
Show
This last group of entries are entered together and used in combination with the Row layout definition to restrict the accounts to be reviewed by Group, Cost centers or Sub accounts depending on your account number structure.
Pick one of the following codes:
|
Code |
Type |
|
P |
Cost center/Sub account |
|
G |
Cost center group/Sub account group |
|
A |
All sub accounts |
|
Format |
One letter from the list above |
|
Example |
Type A for <All> |
If you enter P or G, you will need to enter either a group or cost center/sub account.
This selection prints a list of your column layouts.
Select
Column layouts list from the Extract Financial data menu.
The following screen appears:
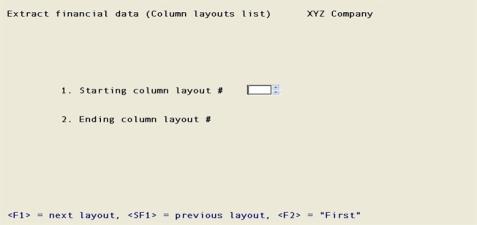
Enter the following information:
1. Starting column layout # through
2. Ending column layout #
Options
Enter the range of layouts to print, or use one of the options:
|
<F1> |
For the next column layout on file |
|
<SF1> |
For the previous column layout on file |
|
<F2> |
For the <First> starting or <Last> ending layout on file |
|
Format |
999 at each field |
|
Example |
Press <F2> at each field |
Field number to change ?
Make any needed changes. Press <Enter> when done to print the list.
The Column layouts: Copy selection enables you to copy an existing layout (including all subaccounts).
Select
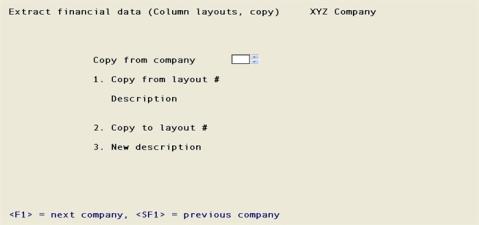
Column layouts, copy from the Extract financial data menu.
The following screen appears:

Enter the following information:
1. Copy from layout #
Options
Enter the number of the layout to be copied from, or use the option:
|
<F1> |
For the next column layout |
|
<SF1> |
For the previous column layout |
|
<F2> |
To copy layouts from another company. This option is only available if you have defined multiple companies, and is explained in Chapter 22. |
Upon selection of a valid layout number, the type of statement and description display.
|
Format |
999 |
|
Example |
Press <F1> |
2. Copy to layout #
Enter the new layout number. This must not already be on file.
|
Format |
999 |
|
Example |
Type 001 |
3. Copy to description
Enter the description of the new layout.
|
Format |
Two lines of 25 characters each |
|
Example |
Type Balance Sheet |
Copying layouts from another company
When you use the <F2> option to copy a layout from another company, an alternate screen is displayed.
The following screen appears:
Enter the following information:
Copy from company
Options
Enter the company code whose column layout you want to copy. This must have the same account number structure as the current company. You may use the options:
|
<F1> |
For the next company |
|
<SF1> |
For the previous company |
|
Format |
Two characters |
|
Example |
Press <F1> |
1. Copy from layout #
Options
Enter the number of the source company’s column layout number, or use one of the options:
|
<F1> |
For the source company’s next layout |
|
<SF1> |
For the previous layout |
The type of statement and its description display.
|
Format |
999 |
|
Example |
Press <F1> |
2. Copy to layout #
Options
Enter the number to assign to the new column layout. This must not already be on file in the new company. You may use the option:
|
<F2> |
For the next available column layout number |
|
Format |
999 |
|
Example |
Press <F2> |
3. New description
Options
Enter the description for the copy to column layout. This field is optional. You may use the option:
|
<F2> |
To use the same description as for the <copy from> layout |
|
Format |
Two lines of 25 characters each |
|
Example |
Press <F2> |
Field number to change ?
Make any needed changes. Press <Enter> to copy and there will be a period of processing as records are copied. The record currently being processed will display on the screen. When done, press <Esc>.
An internal numbering system is used in the computer to keep the layout lines in sequence. If many changes are made to a layout, you may get a message (while editing the layout) stating that the layout must be resequenced. It is highly unlikely that this will ever occur during your use of General Ledger extracting financial data, but should it occur, use this selection to resequence the layout. Once done, you may continue editing the layout.
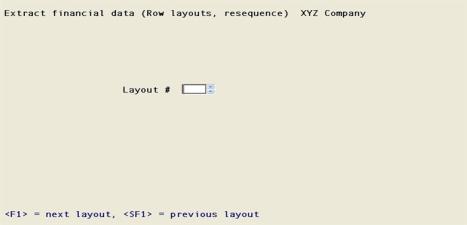
Select
Column layouts, resequence from the Extract financial data menu.
The following screen appears:
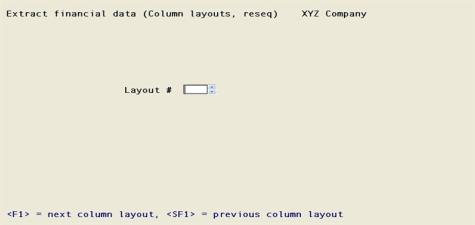
Enter the following information:
Layout #
Options
Enter the number of the layout to be resequence, or use the option:
|
<F1> |
For the next column layout |
|
<SF1> |
For the previous column layout |
|
Format |
999 |
|
Example |
Press <F1> |
Field number to change ?
Make any needed changes. Press <Enter> and the resequencing begins. Upon completion, you are informed of the number of lines that were read and written.
Select
Row layouts, enter from the Extract financial data menu.
The following screen appears:
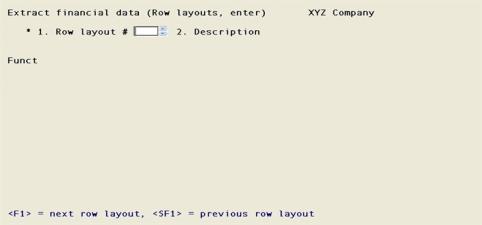
Enter the following information:
1. Row layout #
Options
Enter the number of the row layout or use the option:
|
<F1> |
For the next row layout number |
|
<SF1> |
For the previous row layout number |
|
Format |
999 |
|
Example |
Press <F1> |
2. Description
Enter a description of this row layout.
|
Format |
2 lines of 25 characters each |
|
Example |
Sales schedule rows |
Field number to change ?
Options
Make any needed changes. For an existing layout you may also use one of the options:
|
<F1> |
For the next row layout |
|
<SF1> |
For the previous row layout |
|
<F3> |
To delete this layout. You can delete a layout even though an existing specification references it, so be careful. |
|
<Enter> |
To edit the detail lines. |
Use the bottom portion of this screen to enter accounts and function codes which control the content and appearance of the values being extracted in the financial data file.
This is a scrollable screen of unlimited length.
You enter one line for each account or function in the order in which you want them to appear or to be performed.
Options
You can change the order in which the lines appear or modify the content of each line by using these keys shown on the screen:
|
<Up> |
To move to the next line |
|
<Down> |
To move to the previous line |
|
<PgUp> |
To move to the previous screen |
|
<PgDn> |
To move to the next screen |
|
<F1> |
To allow insertion of a new line at the current line's position (moving all subsequent lines down by one line) |
|
<F2> |
To move or copy the current line. After pressing <F2>, go to the line below the location where you want the line, and press <Enter> to move the line (deleting it from its original location), or <F1> to insert the copy, or <Esc> to cancel the move/copy |
|
<F3> |
To delete the current line |
|
<F6> |
To jump directly to an account number (enter the account number) |
|
<F7> |
To get a menu of the functions |
|
<Esc> |
1. To exit the function when you are done entering the layout 2. To cancel a change or a move/copy function |
Each line is identified by a function code. You can enter the code directly or use <F7> to bring up a menu of the available selections. These are the only functions allowed, you can use <Up>, <Down>, <Left>, and <Right> to highlight the desired function, and then press <Enter> to use it.
If <Enter> was pressed from the function menu, the function menu window closes to allow data entry in the columns appropriate for that function. The format is different for each function, but the cursor only moves to the appropriate columns.
If you are familiar with Financial statements layouts available functions, you can skip the following chapter.
Several functions can be used to format your financial data file. These are described here in this order: The ACCT and FULL account number entries, the lay-out functions, and functions used to calculate, print, and clear subtotals.
Account Number: the main and sub accounts, excluding cost center
The ACCT code allows you to enter the account number. This is only the main account and sub account segments (if used). An <F2> option is provided to consolidate the sub accounts of the main account.
If cost centers are used they will be combined from the column layout for each column when the actual financial data file is generated.
Full Account Number: the cost center, and the main and sub account number segments
The FULL code allows you to enter the cost center and the main and sub account numbers.
When the financial data file is generated the amounts from the full account number will be located in any column that includes the cost center of this account.
Account ranges
An account range refers to a set of accounts which you specify by entering starting and ending main account numbers.
The purpose of entering an account range is to reduce the number of entries required to create a layout.
Account ranges may be used with or without wild-cards in the subaccount field. During entry of the account range, you may either enter a single subaccount number or use a wild-card.
For example, suppose you want the layout to include only the -000 accounts from this set:
|
1100-000 |
Accounts receivable - Trade |
|
1100-100 |
Accounts receivable - Employee |
|
1100-200 |
Accounts receivable - Vendor Refunds |
|
2000-000 |
Accounts payable - Trade |
|
2000-100 |
Accounts payable - Taxes |
|
2000-200 |
Accounts payable - Supplies |
You could enter a range of accounts:
|
RNG |
Beg 1100 |
End 2000 |
subacct 000 |
|
|
|
|
|
This stands for accounts 1100-000, 1200-000, and 2000-000.
Account Ranges with Wild-Cards (Heading 4)
You can also use ranges and wild-cards together to reduce the number of entries required. The accounts shown above could all be included in the layout if you entered:
|
RNG |
Beg 1100 |
End 2000 |
subacct * |
|
|
|
|
|
Or, if you wanted to exclude the accounts with a -000 subaccount:
|
RNG |
Beg 1100 |
End 2000 |
subacct + |
|
|
|
|
|
The functions used to lay out text are:
Line Feed
LF causes one or more lines (empty rows) to be added to the financial data file, depending on how many lines you specify.
Underline
UL causes a row of underline characters to be added to the financial data file.
Double Underline
DL causes a row of double underline to be added to the financial data file.
Literal
This code prints exactly (literally) whatever you type next. You can enter up to 50 characters to print.
Two functions cause sub totaling, with the subtotal extracted (SUB) or not extracted (CLS). For complete explanation on these two functions, please refer to Subtotal Functions section of the Entering Layouts chapter for the Financial statements.
Subtotal
This code causes a row containing a subtotal to be added to the financial data file. (SUB1 is the lowest level. SUB9 is the highest level.)
SUB totals the amounts of all accounts extracted.
Enter the code. After you enter a SUB, a field appears which is used for printing accounting ratios. If no accounting ratios are to be printed on the statement, leave this field blank. Refer to the section titled Accounting Ratios in the Entering Layouts chapter for the Financial statements.
After the subtotal is extracted, any preceding subtotals are cleared, starting at level 1, up through the level number of the subtotal code.
For example, SUB1 clears any preceding level 1 subtotals only. SUB3 clears any preceding subtotals for levels 1, 2, and 3. SUB9 clears any preceding subtotals.
Clear subtotal without extracting.
This causes the subtotals from level 1 through the level you specify to be cleared without extracting.
For example, CLS1 clears preceding level 1 subtotals only. CLS3 clears preceding subtotals for levels 1, 2, and 3. CLS9 clears all preceding subtotals.
You may find this code useful in the final formatting of the financial data file you will generate.
(After you enter the CLS1-CLS9 code, the field which appears is for printing accounting ratios. If no accounting ratios are to be printed on the statement, leave this field blank. Refer to the section titled Accounting Ratios in the Entering Layouts chapter for the Financial statements.)
This selection prints a list of your row layouts.
Select
Row layouts list from the Extract Financial data menu.
The following screen appears:
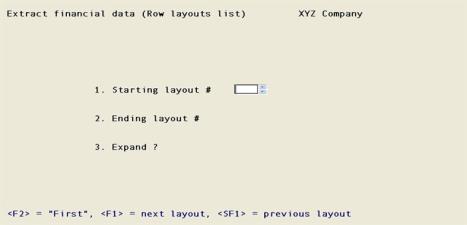
Enter the following information:
1. Starting layout # through
2. Ending layout #
Options
Enter the range of row layouts to print, or use one of the options:
|
<F1> |
For the next row layout on file |
|
<SF1> |
For the previous row layout on file |
|
<F2> |
For the <First> starting or <Last> ending row layout on file |
|
Format |
999 at each field |
|
Example |
Press <F2> at each field |
3. Expand ?
Answer W to expand the range entries and accounts containing a wild-card, so that each main-account and subaccount combination which might be included is shown.
Answer S to expand the account and range entries to show the list of specific accounts that could be included when a financial data file is specified for a cost center, a cost center group or for all cost centers. If your account number format does not use cost centers, this option is not available.
Answer N to show the entries as they are in the layout without any expanded lists.
|
Code |
Description |
|
N |
No expansion |
|
W |
Expand with Wild cards and ranges |
|
S |
If your account number format does not use cost centers, this option is not available
To expand the account and range entries to show the list of specific accounts that could be included when a financial data file is specified for a cost center, a cost center group or for all cost centers |
|
Format |
One letter, either N, W or S |
|
Example |
Type N |
4. Enter cost ctr/group
If you did not enter S in Field #3, or if your account number format does not use cost centers, this field does not appear on the screen.
Otherwise, enter one of:
|
Code |
Description |
|
P |
Expand cost center |
|
G |
Expand cost center group |
|
A |
Expand <All> cost centers |
|
Format |
One letter from the list above |
|
Example |
Type A for <All> |
P = Expand cost center
If you answer P, you will be prompted to enter a valid cost center.
Options
At each cost center segment you may use one of the options:
|
<F1> |
For the next segment (division or department) |
|
<SF1> |
For the previous segment |
|
<F5> |
For <All> accounts |
If your cost center has two segments you may use <F5> at either segment to select all departments for a particular division or vice versa, or at both segments to select all accounts regardless of cost center. The latter is effectively the same as entering A.
|
Format |
Your standard cost center format, in one or two segments, as defined in Company information |
|
Example |
(Does not occur in this example because you have chosen A for <All>) |
G = Expand cost center group
Options
If you answer G, enter the group code. This must previously have been defined in Cost center groups. You may use one of the options:
|
<F1> |
For the next group |
|
<SF1> |
For the previous group |
|
Format |
Eight characters |
|
Example |
(Does not occur in this example because you have chosen A for <All>) |
A = Expand <All> cost centers
If you answer A, all accounts are selected without regard to cost center.
Field number to change ?
Make any needed changes. Press <Enter> when done to print the list.
The Row layouts: Copy selection enables you to copy an existing layout (including all subaccounts).
Select
Row layouts, copy from the Extract financial data menu.
The following screen appears:
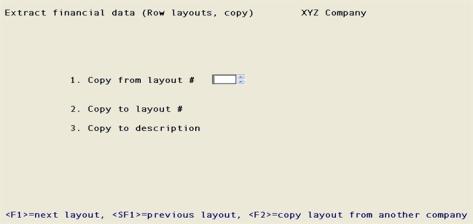
Enter the following information:
1. Copy from layout #
Options
Enter the number of the layout to be copied from, or use the option:
|
<F1> |
For the next row layout |
|
<SF1> |
For the previous row layout |
|
<F2> |
To copy row layouts from another company. This option is only available if you have defined multiple companies, and is explained in Chapter 22. |
Upon selection of a valid row layout number, the type of statement and description display.
|
Format |
999 |
|
Example |
Press <F1> |
2. Copy to layout #
Enter the new row layout number. This must not already be on file.
|
Format |
999 |
|
Example |
Type 001 |
3. Copy to description
Enter the description of the new row layout.
|
Format |
Two lines of 25 characters each |
|
Example |
Type Balance Sheet |
Copying layouts from another company
When you use the <F2> option to copy a row layout from another company, an alternate screen is displayed.
The following screen appears:
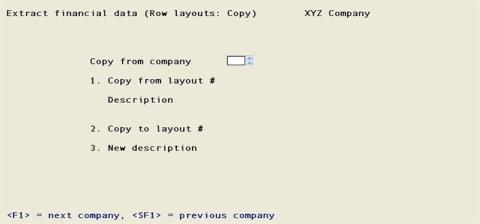
Enter the following information:
Copy from company
Options
Enter the company code whose layout you want to copy. This must have the same account number structure as the current company. You may use the options:
|
<F1> |
For the next company |
|
<SF1> |
For the previous company |
|
Format |
Two characters |
|
Example |
Press <F1> |
1. Copy from layout #
Options
Enter the number of the source company’s row layout number, or use one of the options:
|
<F1> |
For the source company’s next layout |
|
<SF1> |
For the previous layout |
The type of statement and its description display.
|
Format |
999 |
|
Example |
Press <F1> |
2. Copy to layout #
Options
Enter the number to assign to the new row layout. This must not already be on file in the new company. You may use the option:
|
<F2> |
For the next available column layout number |
|
Format |
999 |
|
Example |
Press <F2> |
3. New description
Options
Enter the description for the copy to row layout. This field is optional. You may use the option:
|
<F2> |
To use the same description as for the <copy from> layout |
|
Format |
Two lines of 25 characters each |
|
Example |
Press <F2> |
Field number to change ?
Make any needed changes, Press <Enter> to copy. There will be a period of processing as records are copied. The record currently being processed will display on the screen. When done, press <Esc>.
An internal numbering system is used in the computer to keep the layout lines in sequence. If many changes are made to a layout, you may get a message (while editing the layout) stating that the layout must be resequenced. It is highly unlikely that this will ever occur during your use of General Ledger financial data extraction, but should it occur, use this selection to resequence the layout. Once done, you may continue editing the layout.
Select
Row layouts, resequence from the Extract financial data menu.
The following screen appears:
Enter the following information:
Layout #
Options
Enter the number of the row layout to be resequence, or use the option:
|
<F1> |
For the next row layout |
|
<SF1> |
For the previous row layout |
|
Format |
999 |
|
Example |
Press <F1> |
Field number to change ?
Make any needed changes. Press <Enter> and the resequencing begins. Upon completion, you are informed of the number of lines that were read and written.
This selection is used to define and maintain the specifications so that many different financial data files can be generated from the combination of any column and row layouts. Both layouts and specifications are retained on file and both are needed to generate actual financial data files. In the broadest terms, the row layout controls what appears in the different rows of the financial data file, while the column layout controls what appears in the columns.
You may define, change or delete a specification, or flag it for printing on the next run.
Select
Specifications, enter from the Extract Financial data menu.
Graphical Mode
The following screen appears:
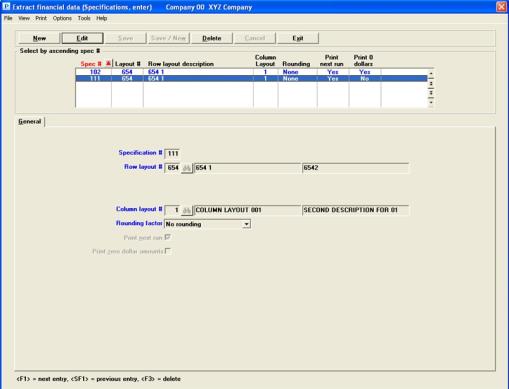
Extract Financial Data Specifications List Box
The list box displays up to 6 existing specifications at a time. You may sort the specifications by specification number in ascending or descending order. To select a field or change the sort order, click on the column name or the arrow to the right of the column name or use the View options. Only column names in red may be sorted.
To locate a specification, start typing a specification number. You may also use the up/down arrows, Page up, Page down, Home and End keys to locate a specification. The <F1> and <SF1> keys function the same as the up/down arrows.
Specifications that display in the list box are available for changes or deletion. The fields for the selected specification display in the lower part of the screen.
When an specification is found, you may select the <Enter> key or Edit button to start editing.
Extract Financial Data Specifications Buttons
When you are adding or editing an existing specification, you have the following buttons, with keyboard equivalent options:
|
Button |
Keyboard |
Description |
|
New |
Alt+n |
To enter a new specification |
|
Edit |
Alt+e |
To edit an existing specification |
|
Delete |
Alt+d |
To delete and existing specification. You may also select <F3> to delete a specification |
|
Save |
Alt+s |
To save a new or edited specification |
|
Save/New |
Alt+w |
To save the new or edited specification with the program ready to enter a new specification |
|
Cancel |
Alt+c |
To cancel the entry of the new specification or cancel the editing of an existing specification |
|
Exit |
Alt+x |
To cancel editing or return to the menu. You may also select the <Esc> key to exit the screen |
Character Mode
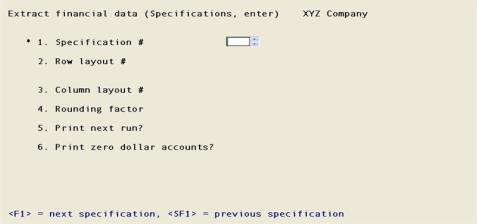
Enter the following information:
Options
Enter the number that you assign to identify the specification (the number cannot be zero), or use one of the options:
|
<F1> |
For the next specification number |
|
<SF1> |
For the previous specification number |
|
Format |
999 |
|
Example |
Type 001 |
Options
Enter the existing row layout number to which these specifications will be applied, or use one of the options:
|
<F1> |
For the next row layout number |
|
<SF1> |
For the previous row layout number |
|
Format |
999 |
|
Example |
Type 001 |
Right row layout ?
Select Y if it is the correct row layout and N if you want to select a different row layout.
Options
Enter the existing column layout number to which these specifications will be applied, or use one of the options:
|
<F1> |
For the next column layout number |
|
<SF1> |
For the previous column layout number |
|
Format |
999 |
|
Example |
Type 001 |
Right column layout ?
Select Y if it is the correct column layout and N if you want to select a different column layout.
This is used when any of the amounts are greater than 999,999,999.99 to accommodate various preferences. Rounding to the nearest dollar will allow up to 999,999,999,999 to appear in the file. Enter one of the following option:
| Character Mode | Graphical Mode | Description |
|
D |
Dollar rounding |
Rounded to the nearest dollar. |
|
N |
No rounding |
No rounding. Dollars and cents are shown. |
|
Format |
Graphical: Drop down list Character: One letter from the list above |
|
Example |
Select No rounding or type N |
This determines whether the financial data file for this specification will be generated the next time Produce files is run.
|
Format |
Graphical: Check box where checked is yes and unchecked is no. The default is unchecked. Character: One letter, either Y or N. The default is N |
|
Example |
Check the box or type Y |
Check this box to print zero dollar accounts, or leave it unchecked not to print zero dollar accounts. This overrides the suppression of inactive accounts described in the Extract financial data Row Layouts, Enter section.
|
Format |
Graphical: Check box where checked is yes and unchecked is no. The default is unchecked. Character: One letter, either Y or N. The default is N |
|
Example |
Check the box or type Y |
Make any changes and select Save. See Extract Financial Data Specifications Buttons
Character Mode
Field number to change ?
Options
Make any needed changes from Field number to change. Then press <Enter> to process another specification. For an existing entry you may also use one of the options:
|
<F1> |
For the next specification |
|
<SF1> |
For the previous specification |
|
<F3> |
To delete this specification |
The selection function lets you turn on the Print next run field (field #5 in the Specifications: Enter selection) on all specifications at once, or on any range of specifications. This is merely a convenient alternative to setting the flag on each specification individually each time you want to generate that financial data file.
Select
Specifications, select from the Extract Financial data menu.
Graphical Mode
Character Mode
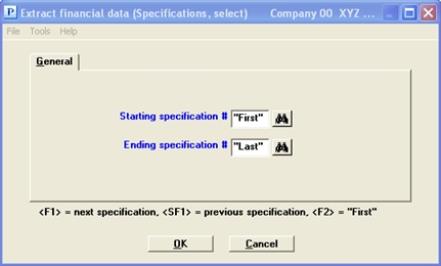
The following screen appears:
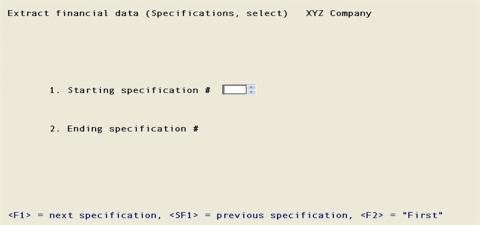
Enter the following information:
Starting specification #through
Ending specification #
Options
Enter the range of specifications to select for extraction, or use one of the options:
|
<F1> |
For the next specification |
|
<SF1> |
For the previous specification |
|
<F2> |
For the <First> starting specification or <Last> ending specification |
|
Format |
999 at each field |
|
Example |
Press <F2> at each field |
Make any needed changes. Select OK or press <Enter> to return to the menu.
This function enables you to clear the Print next run run field for all Extract financial data specifications. If you do not want to unselect them all, you may unselect them individually from the Specifications, enter menu selection.
Select
Specifications, unselect all from the Extract Financial data menu.
The following screen appears which tells you what it is going to do:
Graphical Mode
![]()
Character Mode
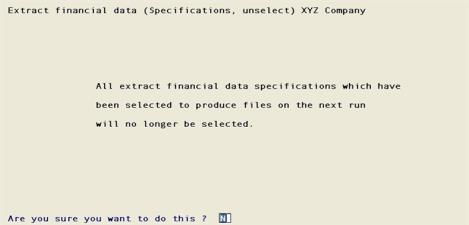
Enter information as follows:
Are you sure you want to do this?
Select Yes to proceed to deselect all Extract financial data specifications, or No to cancel and return to the Extract financial data menu.
|
Format |
Graphical: Yes/No push buttons Character: One letter, either Y or N |
|
Example |
Select Yes or type Y |
The Specifications list selection enables verification of the specifications entered for the statements.
Select
Specifications list from the Extract Financial data menu.
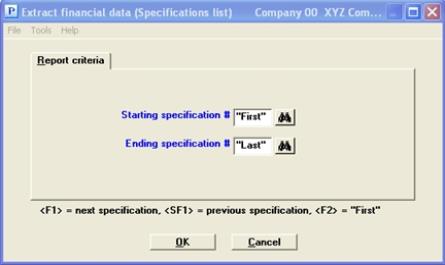
Graphical Mode
The following screen appears where you may enter the starting and ending numbers of the specifications to be printed:
Character Mode
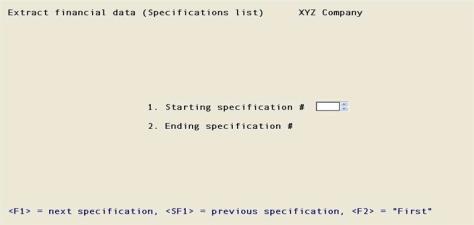
Enter information as follows:
Starting specification # through
Ending specification #
Options
Enter the range of specifications to be printed, or use one of the following options:
|
<F1> |
For the next specification |
|
<SF1> |
For the previous specification |
|
<F2> |
For the <First> starting specification or <Last> ending specification |
|
Format |
999 at each field |
|
Example |
Press <F2> at each field |
Make any needed changes. Select OK to print the Extract Financial Data Specifications List.
This selection is used to generate a sample of the Extract financial data file from a layout so that you can see how the final file will look.
The sample file will look like the Extract financial data file, with these exceptions:
| • | In the sample file, the file name will be SAMP001.CSV, where 001 is the specification number used to create this sample file; |
| • | In the sample file, all amounts will be extracted as 999,999,999.99. |
| • | Account and PATR layout lines that appear in this sample file will not appear on the actual Extract financial data file if their amounts are zero. |
| • | If an account number used in the layout is no longer in the Chart of Accounts File, the description that prints on the actual financial data file will be Account (account number) not on file. |
Select
Produce sample from the Extract Financial data menu.
The following screen appears:
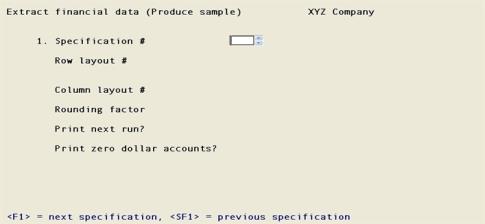
Enter the following information:
1. Specification #
Options
Enter the number of the layout to print, or use one of the options:
|
<F1> |
For the next layout on file |
|
<SF1> |
For the previous layout on file |
|
Format |
999 |
|
Example |
Type 3 |
Field number to change ?
Make any needed changes. Press <Enter> to display the CSV sample.
In character-based (termcap) Linux a message at the bottom of the screen will display. It will indicate that a SAMPL001.CSV file , where 001 is the specification number, is created in the top-level PBS directory.
The Produce files selection enables you to generate the financial data files you have selected to “Print next run”. Each specification which has the Print next run? set to “Yes” will generate one financial data file.
Note that running this selection does not turn off this flag. If you are extracting financial data files individually, you should run Selections: Unselect all after each run.
Select
Product files from the Extract Financial data menu.
Using a Linux server it will display a message at the bottom of the screen indicating that the file was created. The files are created in the top-level PBS directory. No backups are of previous files are made.
In Windows and Thin client the following window appears:
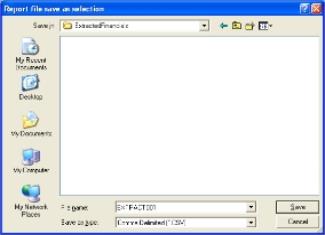
Enter the following information:
File Name
Enter the name of the file or select <Enter> to use the default name.
|
Format |
10 characters |
|
Example |
Select <Enter> for the default name |
Also you can change the location of where the file is saved.
If there is more than one file selected in 'Print next run', you will be prompted to save each file.
There will be a period of processing as each file is generated. This screen will be repeated for each file to generate. The previous directory used and a default filename based on the specification number will be provided.
Using a non-thin client based (termcap) Linux installations an EXTRACT001.CSV file, where 001 is the specification number, is created in the top-level PBS directory.